 |
 |
What you will need:
|
This prop requires multiple pneumatic cylinders, that if not perfectly timed can result in destroyed props.
This is not a project for a beginner in pneumatics.
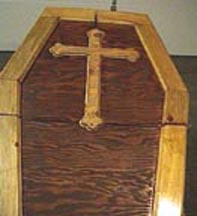
The first thing you will need to do is build a coffin. The coffin will need to have a pneumatic lifter and the prop of your choice to fit inside. The coffin we built is 18" high at the peak and descends to 1/2 an inch. The first step in building their coffin is to make the top. Use the same dimensions as I did in my full coffin's lid. You will now need to cut a exact copy of the lid but decrease the length and reduce each of the sides by the thickness of the plywood and pine. Once the lid and base are complete,, cut the head board to the required size to accompany the lifter and prop. Also keep in mind the space needed for padding if you are planning on upholstering the inside.
The next step is figuring out the sizes and angles of the side walls. I recommend nailing the top and the head board(recessing it the thickness of your plywood and pine) together and then measure each side individually. Work one panel to the next till you have all 5 sides fitting nicely. Once the walls are all set, you are ready to attach the sides to the base. A nail gun with 1.25" nails is very helpful in completing this task. Once the main frame is complete, you are ready to add the pine strips. Work on the sides first and the headboard last. Keep checking that the lid still reaches the ends of all of the coffin. If the lid still fits when all the pine is done, you are ready to to cut the lid.
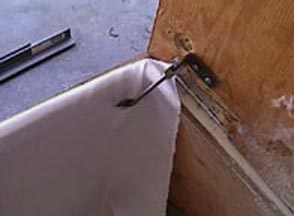
Cut the lid near the base of the lifter, you may need to alter your prop so it fits inside the coffin. You now will need to mount a small scrap of wood to inside of the lid so the 2 lid doors have something to rest on. Once the lid base is cut and you have checked and double-checked to see that it fits you are ready to mount the lower portion of the lid to the coffins frame. Once that is secured, you are ready to cut the lid vertically up the center. This will leave you with your 2 doors, which you will want to secure to the coffins frame with hinges. Once everything is secured together, you can add the last pieces of pine to the lid. Try to get the edges where the cuts are to meet up as close as possible, but not so close that the pine restricts movement.
Your coffin is now ready to be sanded, stained and varnished.Our next step is adding the pneumatic cylinders to the doors. You must have the cylinders mounted in exactly the same position on each side, so the doors will open and close at the same time. You also must make sure that you mount the cylinders close enough to the base of the door (near the hinges) so that the doors will open far enough to let your prop spring out of its lying position. Also make sure that you mount the cylinders so the can pivot on their mounting hole. DO NOT use the threaded base unless the cylinder can pivot using a centered mounting bracket. Drill a hole large enough to fit 2 sets of tubing and any wire you intend on running into the coffin, on the headboard. Now test the cylinders under pressure and make sure the doors open and close nicely. If there is any problems, fix them before going onto the next step.
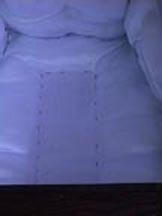
Once the door function properly, you are ready to upholster the inside. Make sure you make a slot for the cylinders rods as well as the mounting surface of the lifter. (See below)
Once the upholstery is complete you are ready to run the air tubing and install the lifter. Once that is complete run a test on just the lifter and set the speed using the flow controls (mounted on the outside of the coffin). Once you are happy with the speed, now run a test on the doors and make sure they open faster then the lifter and close much slower then the lifter. Run a few more tests at different PSI's to ensure that the prop functions the same on each run. Once you are secure that the pneumatics run smoothly, your ready to install your prop.
Your prop should have a means of securing it to the lifters rod. I recommend using metal bars embedded in foam or bolted to a support inside the frame. You don't to hurt a viewer or even worse your prop. Once the prop is secured, run a few more tests and adjust the speed of any pneumatics. Once that's all setup, lock the flow controls into place and your ready to roll. Also if you have time, try experimenting with a cross mounted to one of the doors to hide the cuts. Just make sure the doors will close properly and the prop comes nowhere near comming into contact with it. Also try adding sound for when to doors open. Refer to my stump jumper for directions. Have fun with this one, its beyond effective.
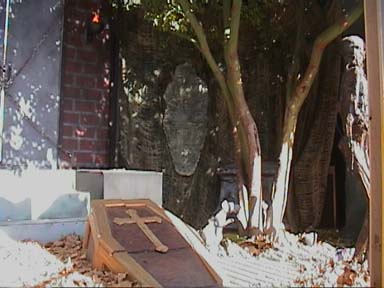
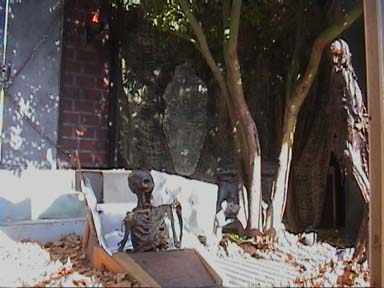
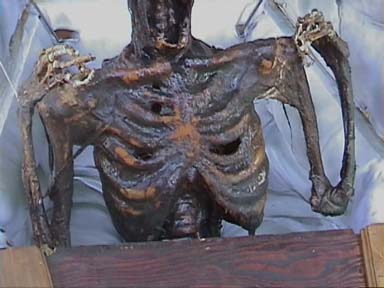
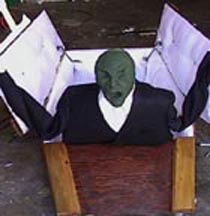
Heres a few pics from the 2002 DC Cemetery. The coffin didnt change at all, but we added a half bucky torso, and a smaller lifter mechanism. Check it out.
 |
|
 |
|
 |
|
 |
|