 |
What you will need:
|
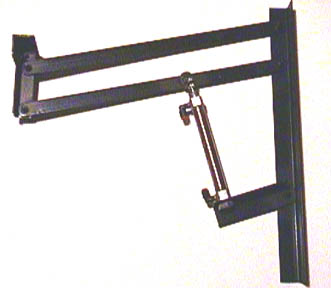
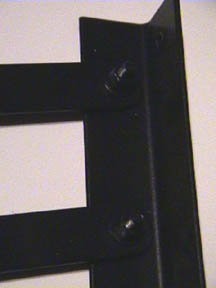
* If you ordering a cylinder, I strongly recommend getting a double end mount cylinder with a pivot hole drilled through the threads. This lifter is touchy, so if for some reason it doesn't lift with the swivel base, you can easily fix the problem by using a pivot bolt. I'll explain more on this later.Once you have the pieces cut out and de-burred, you are ready to start putting it together. The first thing you will want to do is drill the holes in the 20" "L" bar. To do so, drill a 1/4" hole 5" down from the top and a 1/2" in from the outer edge. Now drill another hole at 8" down and the last at 14.5" with the same 1/2" inset. You want both of these holes to be exact or the lifter bars may hit. Once that is done, you will need to drill the holes in the 20" bars. I recommend clamping the 2 bars together and drill a hole on each end 1/2" down and 1/2" in. Once the holes are drilled, you can mount them to the 20" "L" bar with a flat washer on each side of the 20" bar, and secure it with a nylon locknut. Tighten it just enough to be snug, but not so tight that the bar cannot move freely.
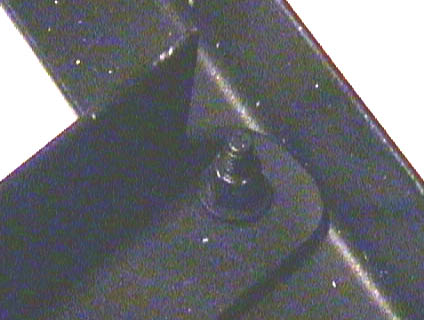
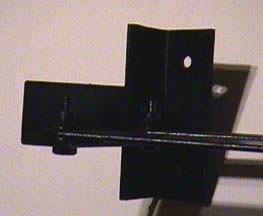
Now take the 6" "L" bar and drill 2 holes, 1 at 2" and the other at 5". Now on the top of the opposite side drill a hole 1" down and 3/4" in. Now take the 4" "L" bar and drill a hole at 2" centered and 1/2" down. Now connect the 4" "L" bar to the "6" vertical bar and drill 1 hole on each end, to use for mounting a prop (see fig).
Now mount the other ends of the 20" lifter bars to the "T" brace with nylon lock washers.
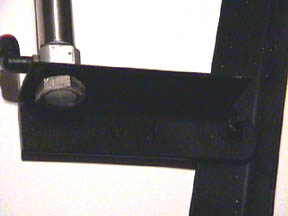
Our next step is to take the 6" "L" bar and you will need to cut a square out of one side then round the extending bar (see fig). When the bar is completely rounded, drill a 1/4" hole 3/4" in from the edge and centered (3/4") (this step is not needed if you use a cylinder with a pivot hole (strongly recommended and a big time saver)).Now take your cylinder mount and drill a 3/4" hole 4.5" from the pivot bolt on the opposite side of the "L" bar (see fig). Now mount the cylinder brace to the "L" bar with the same bolt configuration as you used on the lifter arms. Now that the main frame work is done, paint it with anti-rust paint and allow it to dry. Once the paint is dry, mount the cylinders base to the lower cylinder mount and the clevis to the rod.
Now with the cylinder rod and lifter rods down drill a hole in the lower lifter arm at 6" and connect the clevis to the lower arm. Test it out without air pressure and make sure it moves smoothly. You can also adjust the height of the lift, by moving the clevis hole further or closer from the lower lifter arm's mounting hole.
Now that you are happy with the lift and the movement is smooth, you will need to drill a couple of mounting holes in the opposite side of the "L" bar and mount it to the surface of your choice, either vertically, or across the ground to simulate a horizontal push instead of a vertical lift.Once it's securely mounted hook up your airlines and with a low PSI and test your new lifter. With all pneumatics, start with the pressure low and increase it slowly to the desired strength.
Now add your prop to the top mounting bracket and your ready to start haunting.
If it doesn't seem to be lifting properly, cinch down the bolt on the cylinder base mount and try that, if that helped, add another bolt and you'll be set to go.
 |
|
 |
 |