What you will need:
- Skeleton or chicken wire armature
- Skull, mask, or wig head
- Liquid latex
- Fiberglass cloth
- Cheapspiderwebs
- Disposable paint brushes
- Assorted acrylic paint
- Spray glue
- Crepe Hair
- LED Lights for eyes
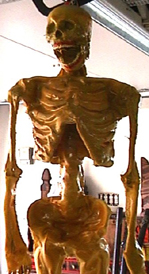
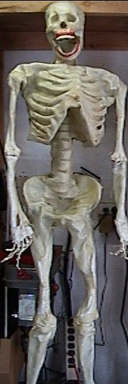
To build a corpse, you will first need to have a frame. I used a Bucky skeleton for the one on the left and a chicken wire armature on the right. A chicken wire armature works just as well, if not better, and is a lot cheaper.
To build an armature, you simply need to make a form out of chicken wire and pose it to your liking. If you are planning on having this be an animated prop, you may want to fill the armature with expandable foam to give it a sturdy base. You may also want to mount a skull to your armature to make your job a lot easier (more info on this type of armature in the gargoyle section of the DC Prop Builders Handbook).
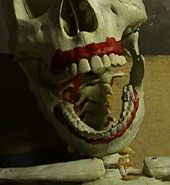
Now you have your main subject shaped, begin to paint in some of the detail around the teeth and gums as well as any other parts of the prop that will not be coated in latex. Now would also be a good time to mount lights for the corpses eyes or whatever else you may need inside the corpse.
When the detail paint is dry begin applying fiberglass cloth to the corpse and saturate it with liquid latex. If you are not familiar with fiberglass cloth, you may want to sample a few different grades. They range from very fine to extremely coarse. I suggest using the finest mat you can find and use small strips or pieces. It may take longer, but you will achieve a better and more realistic effect. Work your way down or up the corpse, taking your time and paying attention to detail. Also be careful around the bucky's moving joints if you plan on having your corpse moveable.
Once you have covered your corpse with the latex covered cloth, you can begin spreading cheap spiderwebs over the corpse and lightly coat those with latex. This is a great way to achieve a torn and rotting flesh look. Ears and other body parts can be built up using the fiberglass cloth and or toilet paper, saturated in latex.
Once you're happy with how it looks, set it aside and allow the latex to fully dry. Depending on what kind/color latex you are using, the color will darken significantly and on some thin areas, turn almost clear. If you see any white areas within the latex, it is still wet and you should put it in a warmer area to dry. Once the latex is fully dried, you're ready to paint.
I strongly suggest painting the corpse with an airbrush and build up a base of light colors then go over the desired parts with darker colors for details. Take your time and pay attention to small details. Add detail with a good old brush and if you wish to give the corpse a wet look, monster makers sells a product called Perma-Wet, which adds a really nice touch to any corpse or prop.
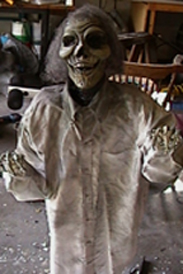
I suggest applying other details such as hair, eyes, ears, partial nose and rotted clothing, but its up to you. If you don't wish to add any extras, your corpse is done. If you choose to add hair, eyes and clothing, then you have a bit more work.For hair I strongly recommend tearing or cutting off small pieces of crepe hair (the braided type) and attach them to the head with spray glue or a similar fast drying glue. For eyes, hot glue or epoxy works well. I have yet to find a really good way to simulate rotted away clothing, and the ways I have tried are a bit to dangerous to mention.
So you should be just about done, so dress up your new corpse prop and go out and display it.
 |
|
 |
|
 |
|
 |
|