2001 |
2002 |
|
 |
 |
The information below is taken entirely from other websites that sell their
own versions of prop controls. DC is not associated in any way with these suppliers,
but in using the products we hightly recommend them.
Midi Control
A Brief Introduction to MIDI
The MIDI (Musical Instrument Digital Interface) standard defines a communications
protocol between electronic musical devices. Any equipment conforming to the
MIDI standard can be operated with any other MIDI device regardless of their
manufacturer and type.
There are many aspects to MIDI, but essentially it is concerned with transferring
information about which notes are being played from a control device (such as
a keyboard, sequencer or computer) to a sound generator (such as a synthesiser,
organ, piano or any other musical instrument capable of being operated by electrical
signals).
The hardware part of the MIDI standard says that the communications will be
in serial format with 1 start bit, 8 data bits, no parity and one stop bit at
a rate of 31,250 bits per second.
Using this hardware definition, groups of 8 data bits (bytes) can be sent from
one MIDI device to another. A further part of the MIDI standard defines how
these bytes relate to what notes are being played.
In a practical system, it's quite likely that you might have several different
sound generators, say one for a melody line, one for the accompaniament and
one for the bass, all being driven by one controller. In such a setup there
would have to be some way for the controller to send the right musical part
to the right sound generator without all the signals getting mixed up. MIDI
achieves this by allowing up to 16 different channels to be allocated. Each
sound generator would be set to a different channel, so the controller can address
each one by its channel number.
To turn a note on, the control device sends a group of bytes in turn which,
between them, say that a note is to be turned on, which MIDI channel is being
addressed, which note is to be played and what the velocity is (how hard the
key on the control keyboard was hit).
To turn a note off again, when the controller key is released, another message
is sent, similar to the one which turned the note on, but this time saying that
the note is to be turned off. As before, the message has to say what the note
is and on which channel it is.
The definition of which note is being turned on or off is done by a single number
within the MIDI message, which can have any value in the range 0 to 127 inclusive.
Each number represents one note in a chromatic musical scale, spanning a range
of over 10 octaves, which is enough for most purposes. Higher MIDI note numbers
represent higher pitched notes and vice versa, the difference in pitch between
two adjacent note numbers being a semitone.
Middle C corresponds to MIDI note number 60, the C# above this has note number
61, the B below this is number 59 etc. Concert pitch A (440 Hertz) has note
number 69.
J D Wale, February 1997.
JW Electronics
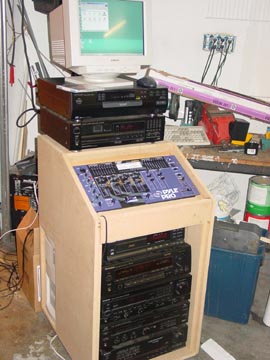
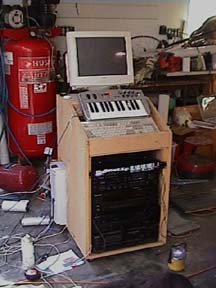
What you need for full haunt control (with 10 stereo outs for total haunt and
sound control) (click on pictures for more info)
 |
 |
 |
Besides a PC or mac, the above is pretty much all you need to
control any voltage between 7 to 35 Volts DC, and if you need more then that,
you can always incorporate a Crydom CXE240D5
Solid state relay, so now you can opperate 7-110 volts all off the one system.
You will need to have the appropriate power supply with appropriate voltage.
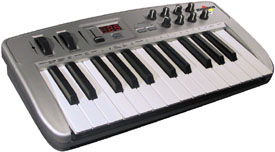
The oxygen 8 keyboard includes a perfect software to run your entire haunt.
If you decide to go midi, and order a board from JW, it would be greatly appreciated
if you note when ordering that you were referred to JW from this site.
Heres more info:
JW Electronics
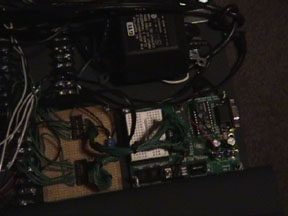
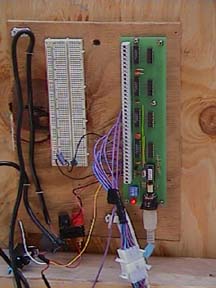
MTP-1 : 32-Note MIDI to Parallel Converter
 |
This is the card we will used for our
2002 haunt. If you would like to use this card with the oxygen 8 keyboard, configuring the card so that output 1 correspond to MIDI note 24 and then count up to output 32 hitting MIDI note number 55. |
The MTP-1 has all the following features :
• Provides a complete interface between any MIDI standard controller and
any device capable of being controlled electrically.
• Supplied as a single high quality glass fibre pcb measuring 220 mm x
50 mm for installation inside a musical instrument or other device.
• Five 3.2mm mounting holes provided on the circuit board.
• 32 outputs (open collector 'pull-down'), each capable of sinking 500
mA at up to 35 Volts, inductive or resistive load.
• Screw terminal connections provided for power supply and outputs.
• 5-pin DIN socket for MIDI input.
• Unit can respond to any one of 16 MIDI channels, selectable by on-board
switches.
• Outputs mapped to MIDI note numbers according to customer requirements,
allowing maximum output utilisation even with non-chromatic scales.
• More than one MIDI note can be mapped to each output if required.
• Many units can be chained together to build up a large system.
• Responds to note on/off, all notes off, active sensing and reset commands.
• Supports MIDI running status.
• LED shows power on and flashes if MIDI communications error.
• Unit is powered by supply for output devices anywhere in the range 7
to 35 Volts DC.
• Supplied with comprehensive installation notes.
The price of this unit is $86 in the USA, including programming, installation
instructions, delivery and technical support by e-mail/telephone. Ordering
Link
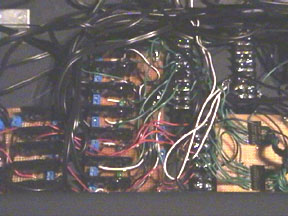
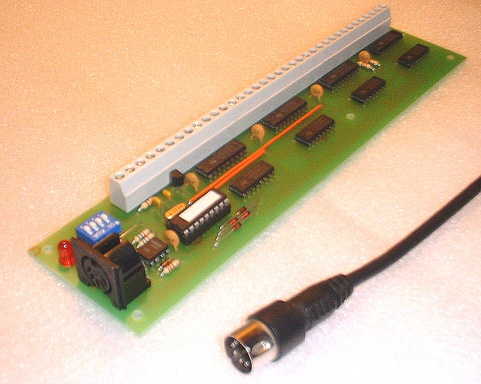
MTP-6 : 64-Note MIDI to Parallel Converter
|
This is the card we will be using for
our 2003 haunt. If you would like to use this card with the oxygen 8 keyboard, configuring the card so that output 1 correspond to MIDI note 24 and then count up to output 64 hitting MIDI note number 87. The Oxygen can be shifted up and down by octives. You won't be able to
play the entire thing at once, but then again, you only are using the
keyboard for general input. If you want to do live stuff with the keyboard,
you just shift it to the appropriate octive and map the keys to the right
output. |
The MTP-6 has all the following features :
• Provides a complete interface between any MIDI standard controller and
any device capable of being controlled electrically.
• Supplied as a single high quality glass fibre pcb measuring 210 mm x
70 mm for installation inside a musical instrument or other device.
• Five 3.2mm mounting holes provided on the circuit board.
• 64 outputs (open collector 'pull-down'), each capable of sinking 500
mA at up to 35 Volts, inductive or resistive load.
• Screw terminal connections provided for power supply and outputs.
• 5-pin DIN socket for MIDI input.
• Unit can respond to any one of 16 MIDI channels, selectable by on-board
switches.
• Outputs mapped to MIDI note numbers according to customer requirements,
allowing maximum output utilisation even with non-chromatic scales.
• More than one MIDI note can be mapped to each output if required.
• Many units can be chained together to build up a large system.
• Responds to note on/off, all notes off, active sensing and reset commands.
• Supports MIDI running status.
• LED shows power on and flashes if MIDI communications error.
• Unit is powered by supply for output devices anywhere in the range 7
to 35 Volts DC.
• Supplied with comprehensive installation notes.
The price of this unit is $142 in the USA, including programming, installation
instructions, delivery and technical support by e-mail/telephone. Ordering
Link
More haunt controller options:
Terror by design’s UDT 2
 |
If you want an extremly simple to use and dependable controller
the UDT 2 is for you. We incorporate as many of Terror By Designs products
into our haunt, and will be a lifelong supporter of their products. Check out everything they have to offer. |
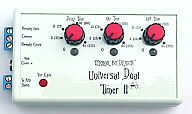
We've totally redesigned our Universal Dual Timer-
We're proud to introduce the Universal Dual Timer II and Universal Dual Timer
IR for:
Effect Control Timing
Repeat Cycle Timing
Add Multiple Units For Stackable Cascade Timing
The Universal Dual Timer IR has an integrated 20 foot range Infrared Sensor.
Control the On and Off time of lights, scares, animations, etc. with the simplicity
of three dials. Set the first knob to control when an action starts, set the
second knob to control how long an effect is on, set the third knob to control
how long an effect is held off so patrons can't keep re-tripping the effect
purposely or accidentally. User selectable timing ranges of 0 to 45 and 0 to
225 seconds giving plenty of time to scare a patron, then keep them moving on
without being able to set off the scare within the timing values you set.
No other cascade timers have these features in one product-
1. Three timing sequences- Delay-Before-On, On-Time and Off-Time.
2. User programmable timing ranges of 0 to 45 or 0 to 225 seconds. The low range makes it easy to set short timing sequences. The upper range covers any timing situation a haunt can run in to.
3. Seconds are set simply by turning knobs, timing is held in non-volatile digital memory.
4. Bi-color lights change color to indicate timing status and readiness, each blinks to indicate seconds passed.
5. A very subtle but audible ticking also indicates seconds as they pass.
6. The UDT II can not only control the Before-On, On and Off times of a single shot event it also works as a repeat cycle timer for continuous, repetitive, timed action and it's functionally stackable (see below) for multiple cascade timing sequences.
7. No need to buy two or three different timers if you want to change actions at a later date.
8. Versatile, use it for low voltage or line voltage devices, AC or DC. The internal relay can control 10 Amps of current.
9. The UDT II can be hooked up to turn off general illumination lights (black out) at the same time it triggers the scare. At the end of the event the lights are returned to normal.
10. Multiple units can be triggered off of one switch input.
11. Reversible, while most scares will use the UDT to switch an event on, it
can also be used in the exact opposite way.
12. Functionally stackable. Multiple units can be wired together, or stacked, to provide a sequence of cascade timing actions to provide timed delays before On or Off. For example- trigger one scare when a switch mat is stepped on, then automatically trigger a second scare 10 seconds later with an additional UDT.
13. Needs no batteries, includes 9 VDC wall transformer.
14. Indicator lights show the timing sequence at all times.
15. Timing functions can easily be added to fogger remote control units by opening the remote's case, taking the two wires going to the push button and wiring one wire to the Common terminal and the other to the Normally Open terminal on the UDT (be very careful to disconnect all power first!). Now the same UDT can run a fogger on and off with automatic repeat cycles or be tripped and timed off a switch mat or T-Sense... the UDT IR has its' own Infrared sensor of course.
16. Test button for activating/cycling or testing your effect manually can be used at any time.
17.The Universal Dual Timer IR has all of the above (no repeat cycle needed with IR) plus an integrated person detecting Infrared sensor located on the end of a 3 foot wire for easy mounting. The 15 to 20 foot range Infrared Sensor works directly with the UDT II's internal computer and power supply as a complete package.
The internal relay has 10 amp. rated contacts for normally open or normally
closed AC or DC control. Works well with our T-Sense via the external terminal
blocks or can be hooked up to any normally open switch like a switch mat, IR
Sensor or remote push button.
Only a minimum knowledge of electrical wiring is required. Perfect for OEM applications
since digital timer settings are not lost when the unit is unplugged. No batteries
required. Includes- Universal Dual Timer, 9 VDC Wall Power Adapter, Instructions.
Ordering
Link
Stamp
Basic Stamp 1(rev d.)
This is the original BASIC Stamp, operating in many custom projects since its introduction in 1992. The Rev. D’s abilities are often underestimated when compared to the BS2 and BS2p, but chances are many of our customer’s programs could be squeezed into this BASIC Stamp. Although the low cost of entry is enticing, we suggest that beginners start with the BS2 because there are more learning tools available for the BS2-IC
Basic Stamp 2sx
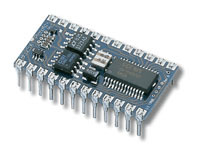
Using Scenix Semiconductor’s SX microcontroller, the BS2SX-IC improved
speed, larger program memory, and fastest serial I/O than all BASIC Stamps except
for the BS2p. Great solution for those needing more horsepower than a BS2-IC
(2.5 times faster). For even higher-performance, you may upgrade to the BS2p.
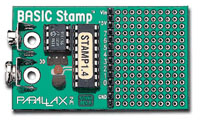
Board of Education
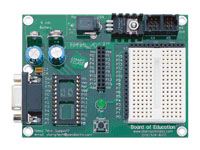
The Board of Education is available as a separate programming board or you may
purchase the "BOE" Full Kit (#28102). Each set of Stamps in Class
curriculum requires a BASIC Stamp 2 with a Board of Education. The BOE was designed
in coordination with our educational customers to teach microcontroller programming
and interfacing. Even if you aren’t using our curricula, it’s still
an ideal project board for instructor-authored BASIC Stamp lessons. Some of
the features: Mechanically interlocked power supply to prevent dual connection
of wall-pack and 9-volt battery; DB9 connector for BS2-IC programming and serial
communication during run-time; P0 - P15 I/O pins, Vdd and Vss connections brought
adjacent to 5.1 x 3.5 cm (2" x 1 3/8") breadboard area; Includes set
of ten (10) color-coded 22 gauge wires; Female 10-pin dual row connector for
optional AppMods (more breadboard space); Traces on top of the board show connections
between BS2-IC and breadboard connections; and #28150 does not include a BS2-IC
or power supply.
Ordering Link
Gilderfluke
Mini Brick:
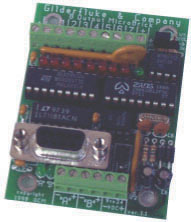 |
If you want the best multi output stand alone controllers
in the industry, gilderfluke is definantly the company to go to. They
have a huge assortment of controllers for just about any application you
can think up. |
 |
|
 |
|
 |
|
 |
|