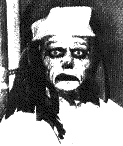
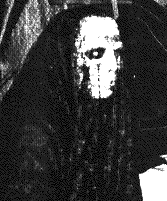
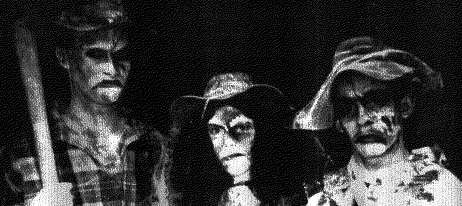
Easy Makeup
 Wearing
simple, easy-to-apply make-up instead of a cumbersome, hot mask gives a
whole other took of being only "recently dead". There are numerous
reference books that can teach you elaborate prosthetic and latex make-up
methods that are very often impractical for most of the performers in haunted
attractions.
Wearing
simple, easy-to-apply make-up instead of a cumbersome, hot mask gives a
whole other took of being only "recently dead". There are numerous
reference books that can teach you elaborate prosthetic and latex make-up
methods that are very often impractical for most of the performers in haunted
attractions.
Here is a simple and quick standard make-up procedure that looks good up close and is highly customized due to the individuality of each performer's facial features. It also has the advantage of self-application after your performer has practiced.
 Try
this:
Try
this:
Using water-based clown white make-up (Mehron's Clown Lite White), sponge
a LIGHT coating (not a heavy "clown" application) on your face
so that there is still some flesh glowing through. Using dark gray/black
(Mehron's Black) make-up applied lightly with a sponge, "hollow out"
your eye sockets, temples, cheeks, under the jaw line and between the chin
and the bottom lip. Blend in to smooth the effect.
With a dark gray/dark brown/black sharpened make-up pencil, enhance the natural wrinkles, furrows and creases of your individual features. Blend and smudge these fines so that they are not hard-edged. Finally, darken your lips.
To give your mouth a permanent, evil twist, darken your upper
lip higher on one side and your lower lip down on the other. Blend corners
of mouth downward.
The most important and expressive feature of your face are the eyes. To
appear ferocious and forbidding, angle all of your eye makeup down towards
the nose.
(Optional) Take moldy greens, sickly yellows and putrid purples and blot lightly in various patches on your face for dead-like discolorations.
Set the makeup using Makeup Setting Powder applied with a soft, wide brush. Only a very light coat is needed. This keeps the makeup from smearing and running from sweat and minor rubbing.
by Jason Sullivan
Sure... We've all seen it...
In Sci-Fi moves, they pump up the cyclotron, the gauge needle reads warning,
then redzone critical, and stuff explodes... The engineering crew are bombarded
with radiation... In old Hammer Horror flicks, the pesants are at Dracula's
gate... they gather, not knowing that Igor has been brewing in his cauldron...
A hapless victim looks up as gouts of hot oil pour down....
Our investigators are in the crypt of Tal-Noh G'asrch. Chuck sees the mouth
of the idol before him, and bravely places his hand inside, just before the
Yeth-Beast spats out his albumenos acid...
Burns. We all get them. Road rash, chemical
burns, radiation... They're uncomfortable, painful, and easily recognizable.
For these reasons, they should be included in a Keeper's arsenel of physical
gore (and used against the players as psychological warfare).
To make a simple first degree burn, you need few items. This type of make
up literally takes seconds to apply, primarily because the wounds are so superfical.
Red make up or powder applied to an area can do the trick. Be sure to use
a stipple sponge during application to give it a raw appearance, and be sure
to blend well into the skin to acheive a blotchy appearance. I'm sure you
could also pre-saturate a plastic "scrubbing sponge" with the needed
make up, placing the item in a plastic sandwich bag, easily concealed on yoru
person. A few swipes, and seconds later...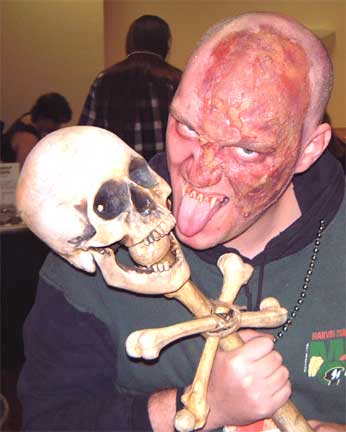
For a more disgusting burn, use petroleum jelly mixed with yellow food coloring with red or black powder around the area. This burn looks much like "wet and dewy" rope burns/rub burns one can get from being dragged about. This is especially disgusting if atamoized water/glycerine/food coloring is sprayed on the area, as it beads on the petroleum jelly (and may continue to bead due to the glycerine)! An extension on this theme can be used to create really gruesome burn effects (ash powder and petroleum jelly to create large areas of char).
Non-flexible collodion is more useful for acid burns. It's a thick clear liquid with a strong chemical (nail polish) smell (that's consequently hard to find). when brushed on, it hardens and contracts the skin, giving the recessed section a glossy sheen. As you can guess, it works best on meaty body parts. It's difficult to remove (unless you have nail polish remover). Translucent liquid make ups in the indentation (such as yellow or red food coloring suspended in Kayro syrup or KY Jelly [more on this below]), and a light redness around the burn (to suggest irritation) gives you a good fresh effect, while the non-flexible collodion by itself works well for healed burns. Gelatin, by far, is my favorite make up. It's cheap, readily available, and easy to apply. It needs to be heated (in a double boiler or in a microwave). The gelatin can be practically translucent or solid colored, flexible or tough, smooth or textured. I will go into gelatin techniques more after I have my Halloween picture scanned (and also, as a prepatory course for the Raw Skull Man make ups).
A quick overview of gelatin: it melts
and then sets. Using three packets of gelatin to an equal ammount of liquid
mixture, you combine the two until you have something the consistancy of apple
sauce. Heat this mixture 15 seconds to a minute in a microwave (depending
on the desired smoothness, more time for smoother <but hotter!. mixture).
Water is the most common liquid.
You can also add glycerine (for moisture, but it reduces it's ashesion), sorbitol
(to preserve the gelatin and stablize it's size), drops of food coloring (for
translucent color), flax snippets (for a veiny appearance), drops of liquid
make up or acrylic-latex paint (for solid color), bread crumbs (for texture)...
there are many possibilities. It can be coated with latex, make up, and translucent
face powder for dead white flesh, or painted with make up or water color,
or "wound filler."
Wound filler is a medium, like KY Jelly,
petroleum jelly, or corn syrup, blended with coloring and "stuff."
The stuff is (for me, coffee and flour) needed to add thickness, texture,
cohesion and color to wounds, and is useful for gashes as well as burns.
Plastic wax, mortician's wax, and nose putty work best with oil based make-ups.
Often times, you need some sort of "scafolding" to work off of.
The suggested scafflding is made up of spirit gum and cotton, stuck and then
whisped away. The whisps of cotton remaining act to anchor the putty, which
is sculped (using tools, cream <to preventing sticking>, and a coat
of sealer). This scaffolding is also useful when coated with latex (which
makes a nice irregular texture). If the skin is stretched while latex is being
applied, the skin wrinkles. The cotton can be left thick for structures, and
coated with liquid make up (ideal for use with other techniques). These techniques
are useful for healed burns or irregularies in the skin, and can also be used
for structures.
Latex can be used to create cuts and lacerations, tears, and dead flesh associated with burns. Painted on, layer by layer, semi-wet, it can be pulled out in strings and re-attached, or textured using stippling for irregularaties while dyring. It can also be used with various "texturizers" to acheive irregularities on the skin. I once used ash power and breadcrumbs along with bone structures made of cotton and some make up to create a charred to the bone hand. Latex can also be colored before application.
A combination of these techniques often yeilds good results. An exaple of this is using plastic wax putty to create "bone structure" around the brow and cheeks, fake teeth, non flexible collodion around the wound area, gelatin structures for the gore, and latex around the edges. Add ash powder, wound filler, and some make up, and you have a fairly realistic looking burned face.
Copyright 2000 Jason Sullivan
Cutting Throats
Cutting throats has become so common-place it wouldn't surprise me if the unions required it in their entrance exams. Looking back on my first experience in "Godfather II", I can laugh, but it wasn't funny at the time. Director Coppola is totally unsympathetic to effect problems. The scene called for De Niro, as the young future Godfather, to observe three punks jump on the local crime boss dressed in a white suit and hat. One punk on his back cuts his throat and they run off. The man picks up his hat and holds it under his neck to keep the blood from ruining his clothes as he runs towards the camera (De Niro's view), turns camera left and disappears down the alley. Coppola insisted on doing the whole scene in one take!
Fortunately, we had one of the greatest special effects men, A.D. Flowers. He rigged two pint cylinders on the actor's right side where they would be least noticeable. One contained blood, the other compressed air to pump it. A wire with a button to turn on the device was taped to the actor's palm for him to work. As usual, Coppola had not really warned the wardrobe department and there were only three white suits and hats. I think they did have time to spray them with SCOTCHGUARD (waterproofing). We shot that scene at least six times before we did the close-ups. Everything worked fine but it was hell trying to restore the actor to pristine whiteness each time. Of course, that long master shot was only used in pieces. In fact, I think it was edited out of the original "Godfather II" and only used in a longer version later.
A throat cut effect is based on the fact that a pre-cut foam latex appliance can be made to open the cut simply by having the actor raise his chin abruptly. It's the only place on a person that you can do this. First you make an appliance that covers the neck from just below the chin to below the collar and from one side of the neck to the other. I would say it should be between 1/8 and 3/16 inches thick (3 and 5 mm) where the cut will be. Be sure to find out how high the collar will be before making the cut. Cut it right through cleanly so that it will go back together again. One problem I've had is that the blood begins to soak into the sponge inside, so I would seal it with PROS-AIDE and powder, the outside too, and paint it with PAX.
For the blood supply, make a Placrylic appliance that spans the neck where the cut is to be. Make a long blood passage with tubing connected at both its ends and make holes at intervals on the upper side. Consider that more blood will come out the first hole it hits than the next ones, so make the holes near the ends smaller and next ones bigger and bigger. If you just want the blood to flow, cut the holes downwards or glue tiny flaps over them. If you want spurts, burn holes straight in with a hot wire.
Application
Tack the foam appliance in position with the actor standing up. Have his head in normal position but a touch on the high side. The cut should be closed. Have him raise his head a bit more. The cut should start to open. Have him really raise it and it should be obviously open. If not, re-position. Then with the head slightly up and the cut partly open, mark the opening on the skin and remove the appliance.
Next glue the Placrylic appliance on with the openings lined up over the line you marked on the skin. The appliance and any skin around that might show through the foam appliance should be painted dark red with R.M.G.P. and powder. I don't suggest PAX because I am afraid of the PROS-AIDE sealer on the back of the foam sticking to it even if powdered.
When you glue the appliance over the blood tubes, tack it on first just as you did before and make sure that you have the position right. If you want the blood to spurt, you have to be especially careful that the opening will totally expose the jet holes. You glue the appliance on in the normal way except that you leave the area around the cut unglued. The more you leave unglued, the more it will open up. As you work, have the actor return his head to normal and jerk it up to make sure it is working the way you want.
For the actual effect, I used some thick sticky blood paste spread thinly on the lips of the cut to make them stay together (don't use too much). That usually left a thin red line that I covered with R.M.G.P. You might paint the inside of the lips red with PAX and use uncolored Karo paste or something similar to hold them closed. Of course, before you do that, pump the blood with your JIFFY Sprayer right up close to the effect and clamp the line. Do all of this on set when everything else is ready to go.
Blood
When I wrote my Monster Make-up Handbook in 1964, make-up blood was made of pigments and glycerin. It looked like paint and tasted terrible and was unsafe to put in the mouth. I recommended using KARO SYRUP and food colors to make a blood that was more translucent and tolerable in the mouth. I didn't actually use it professionally till 1968 for a scene in "Midnight Cowboy" that called for blood in one actor's mouth. It worked so well and looked so much better than Max Factor's blood that I began using it in other films. For "The Godfather", we tested a number of bloods including the real thing and picked the KARO formula. I felt that made it official.
KARO is a corn syrup available in a water-clear and amber color. All the formulas here are for the clear one but the other could be used if the dye formula was readjusted slightly. In England the closest thing to KARO is a product called Golden Syrup. I've made a good blood from it by using a bit less yellow.
Food colors are dyes that will stain skin and clothing very strongly. Fortunately, KARO seems to screen the dye so that staining does not occur on either. Just water will rinse off KARO blood. Some slight stain may remain on some white fabrics but soap (alkaline laundry soaps like Octagon are best) will take the rest out. When KARO is thinned with a great deal with water, its screening action is reduced proportionately.
This only becomes a problem when KARO has to be diluted with equal amounts of water for pumping through small tubes for effects. Even this may no longer trouble us. Recently I discovered that Sorbitol, also derived from corn, prevents the dyes from staining too. Fortunately, Sorbitol is much less viscous than KARO, so it may be possible to use it to make a thin enough blood for pumping or need only slight dilution.
Blood Characteristics
Blood is actually quite bright and the hue is warm red. When it is spread thin on the skin, it is transparent and orangey but when thick, it looks much darker and more opaque. I used to add materials to make my blood slightly opaque. I didn't want it to look like red glass. But then I found that it looks dense enough if enough dye is used. KARO tends to bead up when it flows over skin or clothing. That's not natural, so I add a wetting agent to the formula, usually Kodak Photo Flo 200. I'll give you some formulas but I can't guarantee the dyes will always be the same. There's nothing like comparing the results with blood from pricking your own finger.
Food Colors
Food colors are made from FD&C dyes (meaning certified for use in food, drugs and cosmetics). D&C dyes are harmful if ingested in quantity. The liquid food colors are not common in supermarkets as they used to be. You may find some one ounce bottles but usually there are only the sets of very small bottles. You may find the liquids in large bottles if you find a bakery supply store (check "yellow pages"). Such stores also sell KARO in gallons at a saving over the pint bottles in the markets. One problem with using the liquid food colors is that you may not be able to identify or get the same color next time.
In the long run buying the food colors in powdered form is better, though they can involve quite a cash outlay. By weighing these colors you can get very good consistency in your mixes. There is only one large company now that deals in these materials. The smallest packaging is one pound. They will send you samples of any colors you want to try.
Food Color Sources
Warner Jenkinson Co., 2526 Baldwin, St. Louis, MO 63106, 800/325/8110 will sell dyes by the pound with no minimum order. Some items like D&C Red 33 (their prod. #7333) are packaged in drums but they will charge you $3 extra to pack a pound, making the total price $58. FD&C Yellow #5 is $11.35/lb. and FD&C Red #40 (dye, not Lake) is $18.55. They have branches in Irvine, CA and Carlstadt, NJ. Those are very old prices.
Bob Kelly Cosmetics, 151 West 46 St., New York, NY 10036; 212/819-0030 now sells 2 oz. jars of various cosmetic pigments. They also have the Red #40 dye.